
Before you start
Choose a destination folder. Review the current Tapquence screen and the requirements above before changing anything.
- Destination folder
- Fallback filename
- One test screenshot
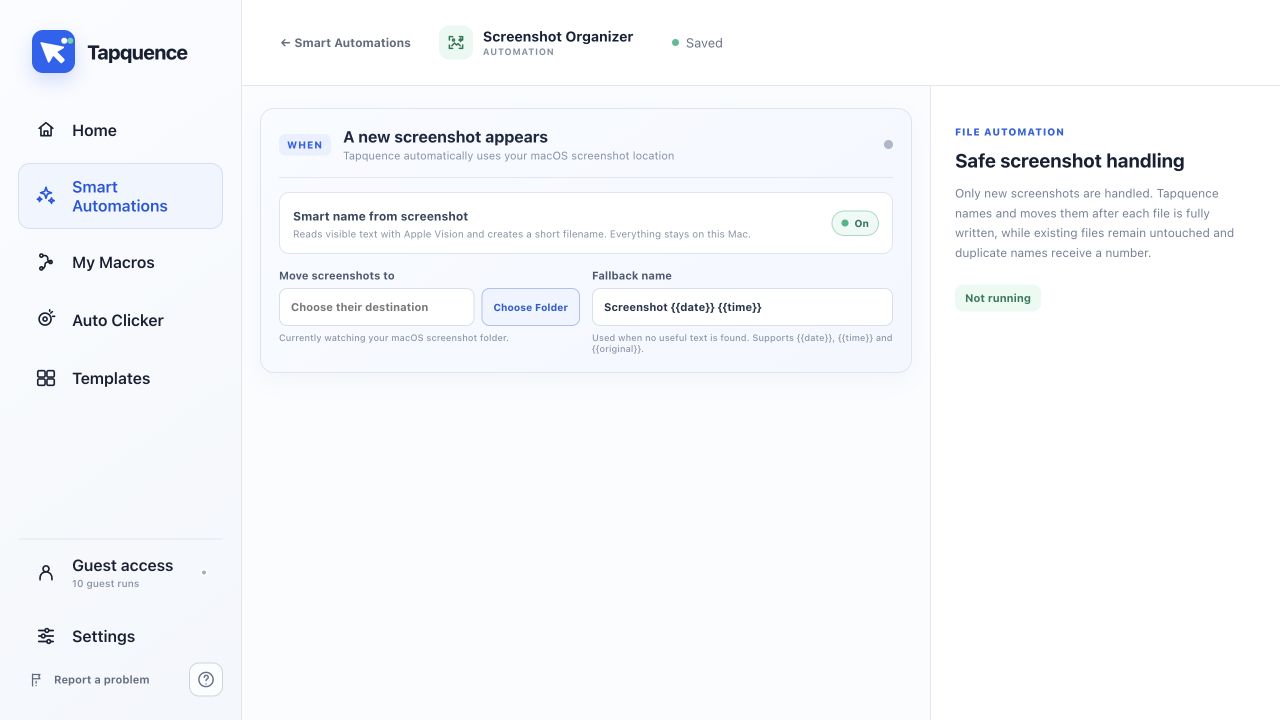
Configure naming
Screenshot Organizer watches for new macOS screenshots, creates a useful filename from visible text when possible and moves each file into the folder you choose.
Quick answer
Open Smart Automations, configure Screenshot Organizer, choose the destination folder and switch the automation on. Existing images stay untouched.
1. Choose a destination folder
Select a dedicated folder for organized screenshots. A folder picker is safer and easier than typing a path manually.
2. Choose smart or fallback naming
Smart naming reads useful visible text from the screenshot on your Mac. When no clear text is found, Tapquence uses the fallback filename with the date and time.
3. Switch the automation on
Once enabled, Screenshot Organizer watches the standard macOS screenshot location for new image files. It does not reprocess the files that were already there.
4. Check the first result
Take a test screenshot and confirm the name and destination. If a filename already exists, Tapquence adds a number instead of overwriting the previous file.
What stays local
Screenshot text recognition and file handling run locally on your Mac. Still avoid taking screenshots of passwords or information you do not need to store.
Test the result
Run the smallest useful example once and verify the result before enabling repetition or relying on the complete workflow.
Troubleshoot
Confirm the installed app, target, folder or meeting is the one described in this guide.
Reduce the workflow to the smallest failing action and change only one setting at a time.
Use harmless data, add more time where needed and keep the stop control available.
Continue learning
Continue with the matching Tapquence feature or move through the guide sequence.
View Screenshot OrganizerSee how this guide connects to the actual workflow.›