TAPQUENCE SUPPORT
Record your first meeting with Tapquence
From your recording preferences to a recap you can review.
Use Tapquence alongside your usual meeting app. You decide when to record; recognizing a session is separate from capturing its audio. A calendar connection is optional.
1. Prepare Meetings
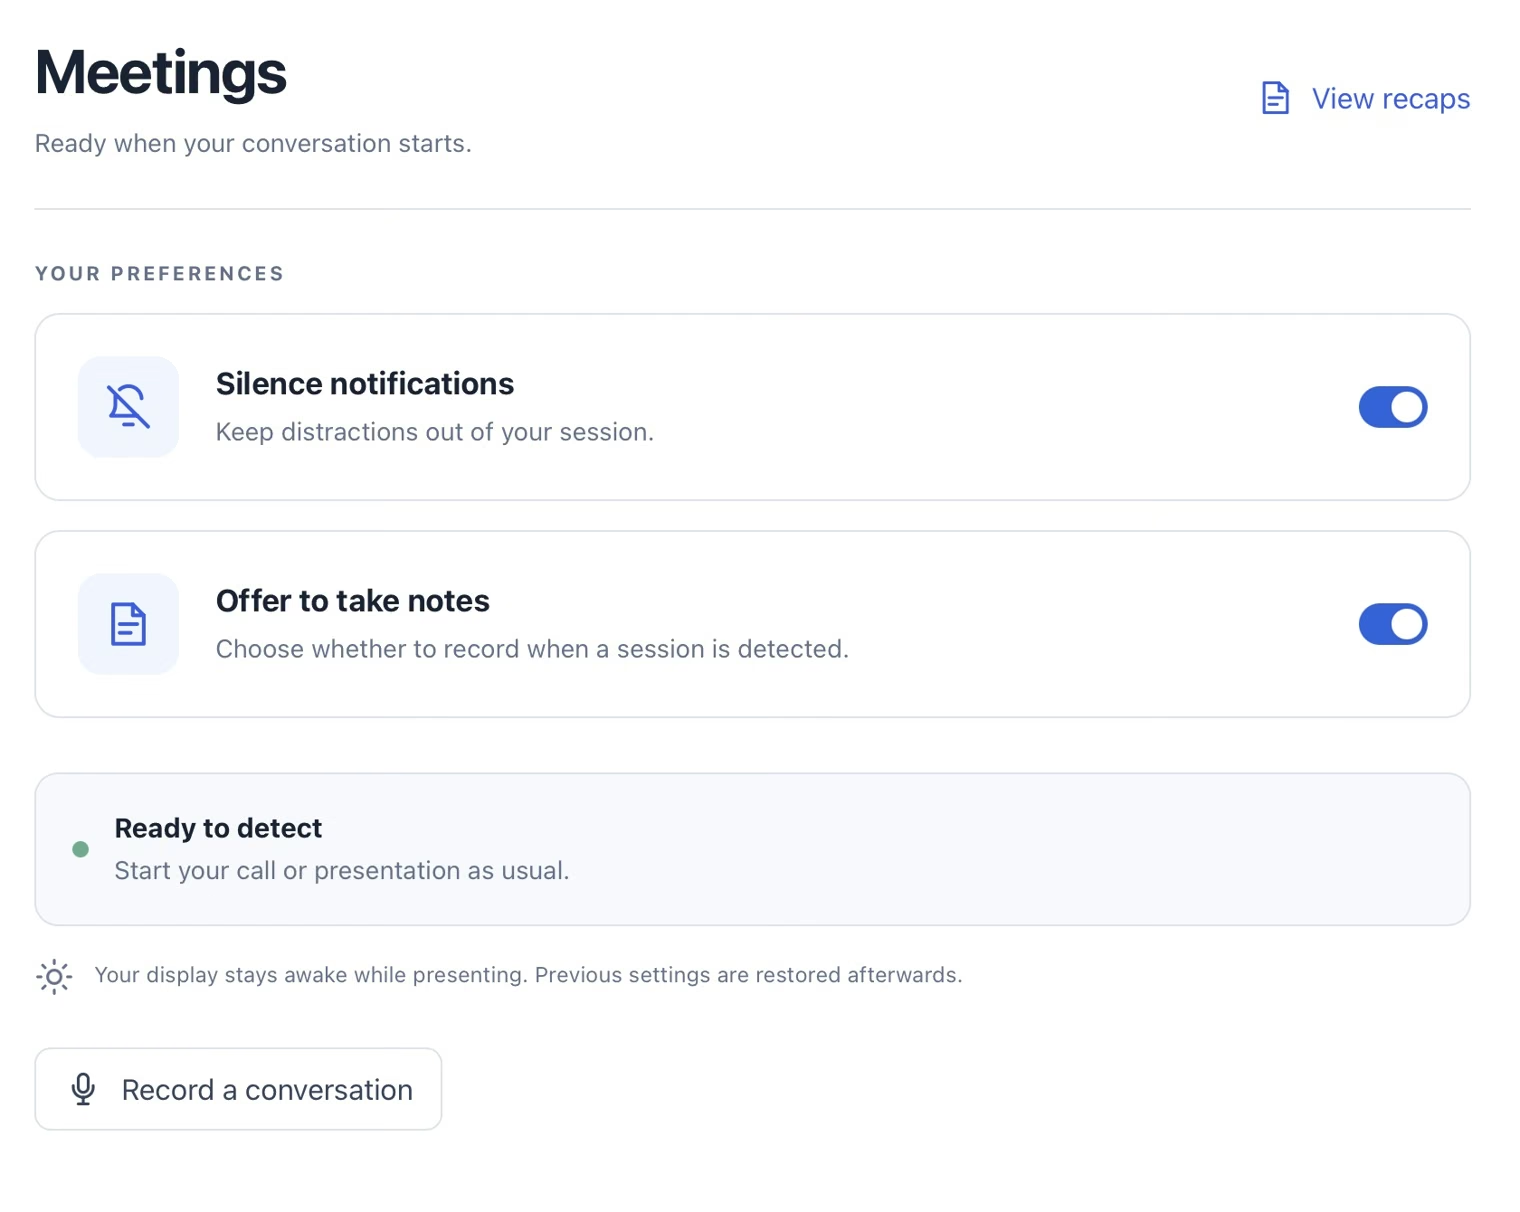
Open Meetings in Tapquence. Turn on “Offer to take notes” if you want a recording choice when a supported meeting or presentation is recognized. Check the detection status and resume it if paused. Automatic recognition availability depends on your plan and the app or browser you use.
2. Allow microphone and computer audio
When requested, allow Microphone and Screen & System Audio Recording in System Settings → Privacy & Security. Your microphone captures your input; computer audio captures the other side of the call, including when you use headphones. Keep Tapquence in Applications and reopen it after a permission change if macOS requires it.
3. Start the conversation and choose to record
Join your call in its own app and accept Tapquence’s note-taking offer when you want to record. Detection alone does not start capture. For an in-person discussion or an unrecognized app, open “Record a conversation” and choose “Take notes” yourself.
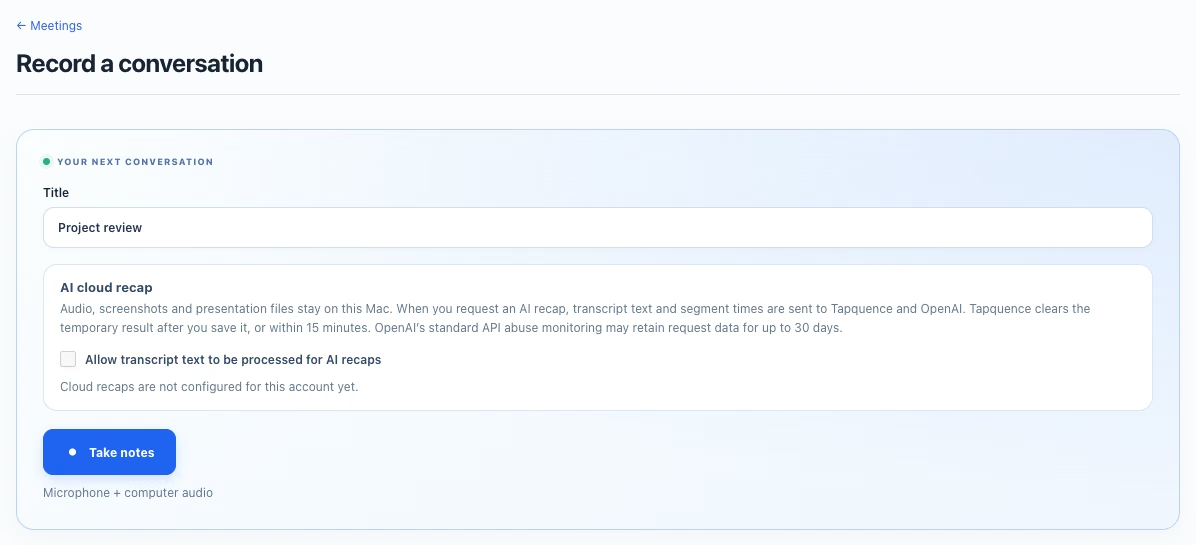
Tell participants when you plan to record and follow the recording requirements that apply to your meeting. Check the recording indicator to confirm capture is active; only one recording can run at a time.
4. Finish and review
Use the recording controls to finish. Wait for the session to finish processing, then open Meetings → View recaps. The first transcription may need to prepare the local speech model. You can listen to the audio and review the transcript before editing or sharing the recap.
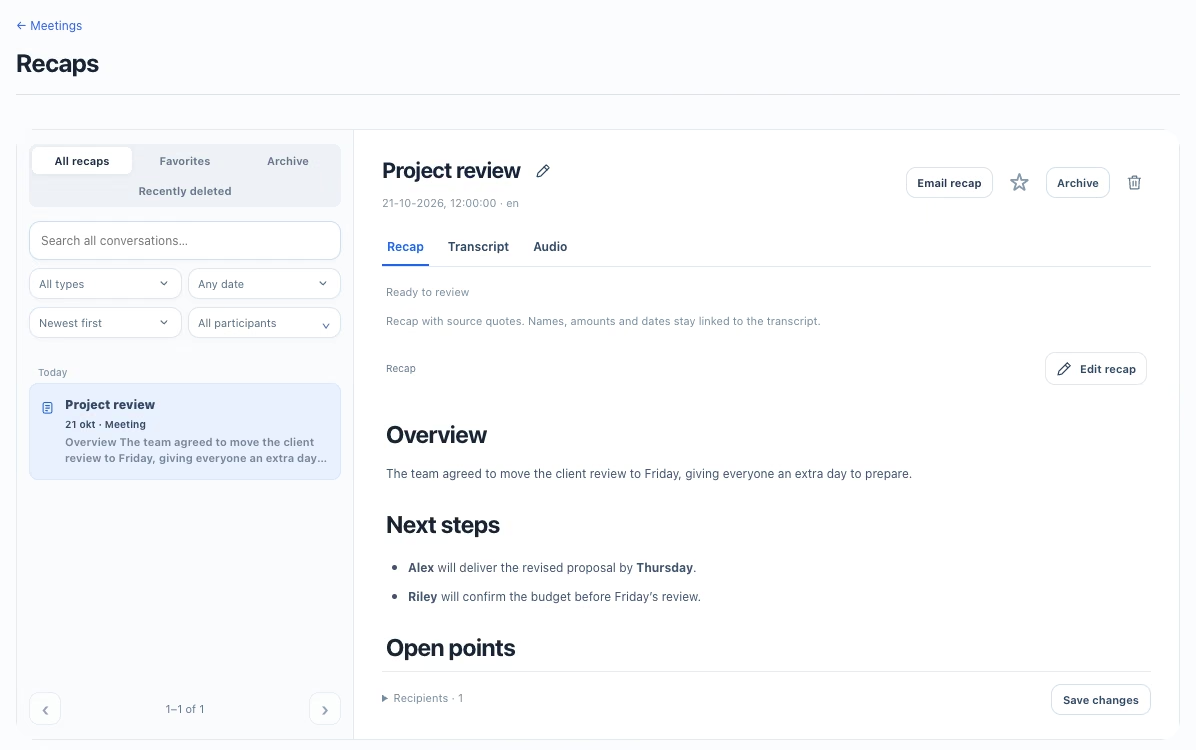
Example screens use fictional conversation data. Available recap features vary with macOS, your plan and optional cloud settings.
